

Fall is here. Fall is my favorite time of year. The smells. The colors. The decor. THE HOLIDAYS! Since I am living on my own for the first time, I'm all about the decor. I didn't want to leave my front door bare and I didn't necessarily want to buy a wreath that everyone else had. I wanted to make something for my front door that I was proud of. I researched and researched and researched on Pinterest for ideas and came up with this. I'm super happy with the end result of this DIY and I can't wait to continue making things for my home! Keep reading to find out how I made this adorable wreath and how you can make one yourself.

WHAT YOU'LL NEED
- Yarn - I chose four different colors but you can choose as many as you want. I also chose the cheapest yarn available. Yarn can be a little exxxxpensive but pick whatever brand/quality/thickness you want.
- Something round to mount the pom-poms - I chose a 12 inch floral and craft ring from Michaels. They make bigger sizes and the floral and craft rings. Michaels also sells styrofoam rings that you can use. I like the floral and craft ring because it had holes already in it, so I could thread whatever I was going to use to hang the wreath through the holes.
- Hot glue gun and hot glue sticks.
- Something to use to wrap the yarn around to make the pom-poms - I was going to use the spatula and fork to wrap the yarn around. I actually found that using my fingers was easier and I could manipulate the yarn better.
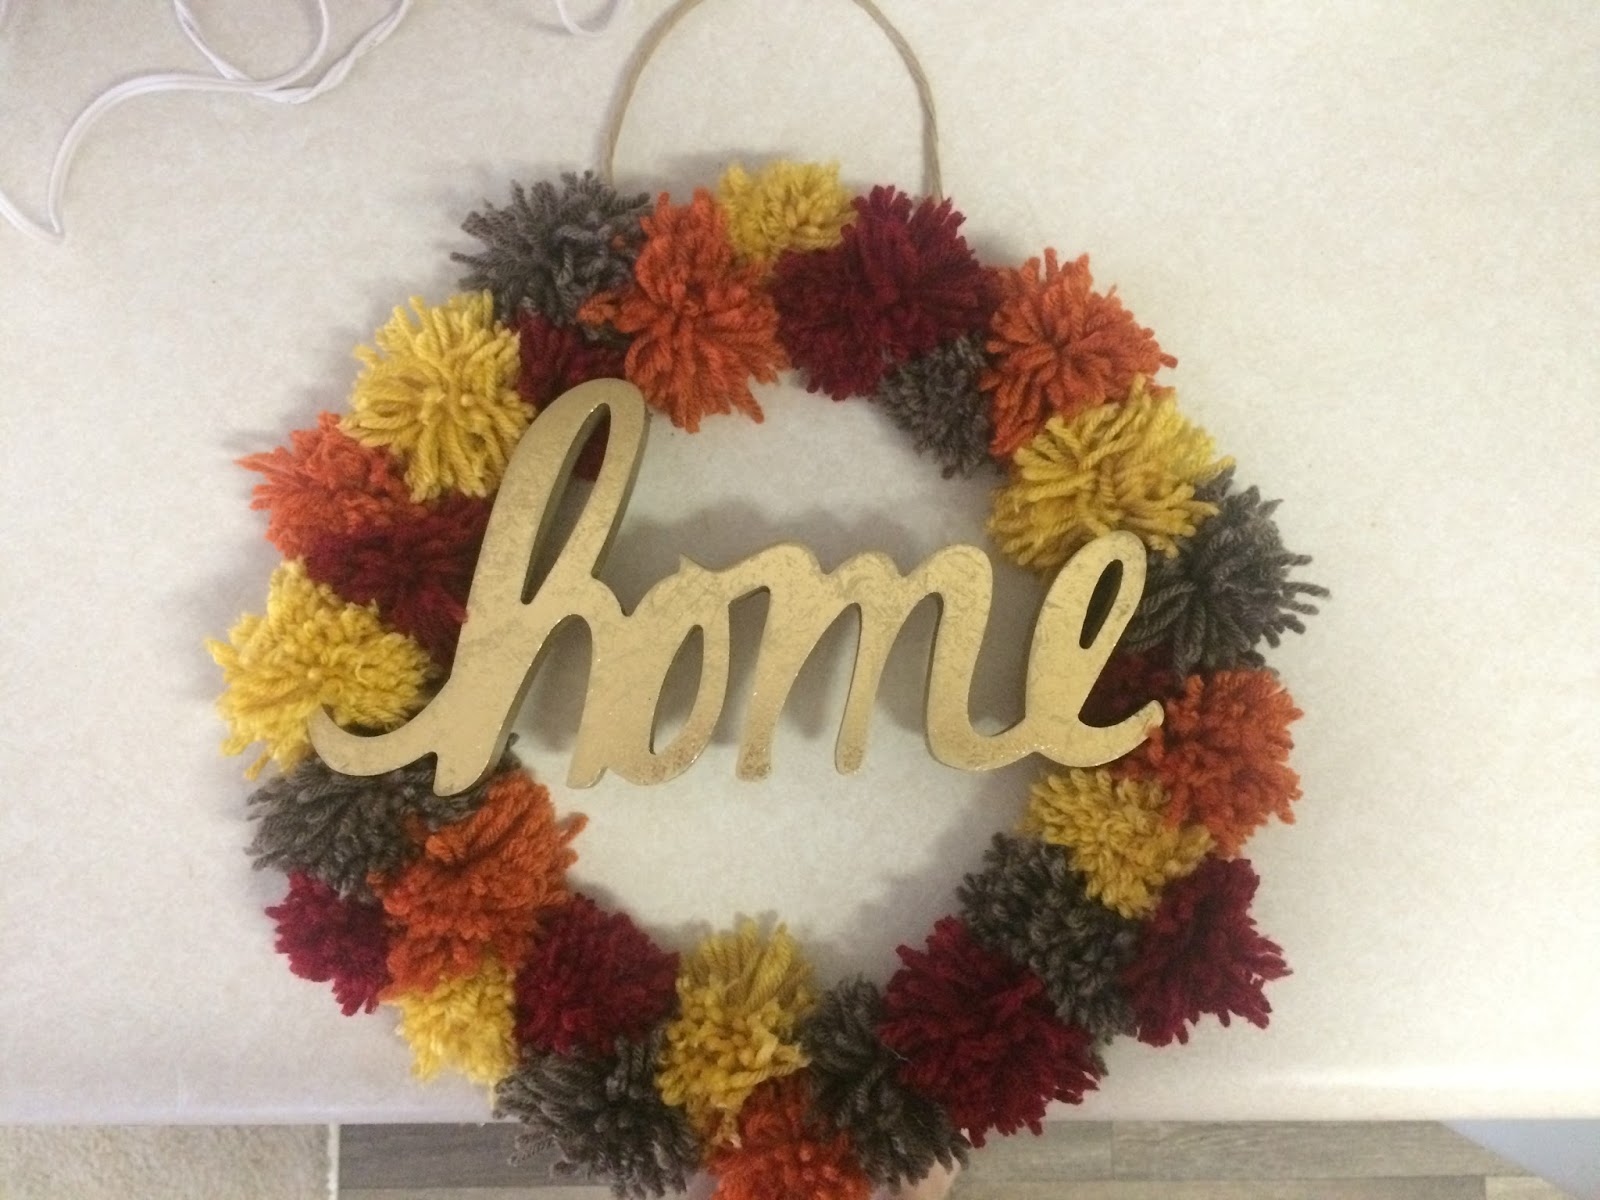
- A sign with a saying - I got my "home" sign from target a long time ago. It was in the dollar spot, I believe it was $3. Anything will do. You don't even have to put a sign if you don't want to.
- Something to use to hang the wreath - I used stem wire to thread through the holes and to hold up the wreath. I also had the idea of braiding yarn and using the braided yarn to hold up the wreath.


The first step to making this adorable DIY fall wreath is to make the pom-poms. You can take the yarn and simply use your hands. Place one end of the yarn in-between your fingers. Wrap the yarn 40 times around your fingers. Take the other end of the yarn and put it in-between the same fingers.


Slide the yarn off your fingers. Tie both ends once, flip the yarn over and double tie the two ends to make a knot, flip the yarn over again and tie a knot again with both ends. Tie tighter each time.


Cut the loops to make the pom-pom.


Cut any excess off to make the pom-pom more uniform and round.


You can make the pom-poms with four fingers like above or two fingers to make smaller pom-poms. I made 25-30 pom-poms of different sizes.


I then took the stem wire, looped it through two holes in my wooden-backing(floral and craft ring), and wrapped the wire around itself. I started to put down hot glue for the pom-poms.


Arrange the pom-poms any way that you'd like and continue to glue them down.

Once you have all the pom-poms down, its time to figure out where you want your saying. Arrange it to where you'd like, and hot glue the parts that will be on top of the yarn. Another way is to flip everything over and hot glue so you can better place the glue. This way you can see exactly which parts will be on top of the yarn.

This is your finished piece. You can stop here or keep going.

I cut a piece of ribbon about 3 feet long to make a bow.


I placed the ribbon where I'd like the bow and tied it like you tie shoes (the bunny ear method).

Play with the bow until you like the way it looks and cut the excess off the ends. I also hot glued the bow center so it would stay in place.

Hang it on your door for you to enjoy!

No comments:
Post a Comment